Tuesday, May 28, 2013

Super Fab Art Display Clips


   These super sparkly and fabulous clips are the perfect way to display your kid's artwork! You may get sick of seeing those ugly vacation magnets or just feel like their artwork deserves more attention...I did! 
   As soon as I started using these clips for Eli's art I could tell that he felt special.  He loved that I was using the 'special clips' to display his art. A little bit of recognition can go a long way in proving to them that they are amazing...because they are!

Materials:
  • Clothespins
  • Two part Epoxy Glue
  • Spray Paint
  •  Glitter!
   Begin by spray painting your clothespins with a thin layer so they have a some color underneath the glitter. Allow the paint to dry a few minutes before you add one last coat. If you are going for the ombre look, just swipe another lighter shade spray paint on the upper half of the clothespin.  Move the can over the clips quickly to get more of a faded look.
   Once the paint has completely dried you can glue the magnet onto the back of the clothespin. I used a two part epoxy to make sure the magnet didn't come loose after a few uses.
   Now add the glitter :) I used Elmer's Glue for the glitter becuase it isn't really holding alot of weight. Add glue to all or part of the front of the clothespin and sprinkle on the glitter.
   Voila! You have a fabulous new way to display your kids awesome art! You could also attach art to a 'clothesline' display using these sparkly clothespins! Now go let them make some new art that you can hang!


Sunday, May 26, 2013

BB in Craft Shows again!

   I'm so excited to say that I have decided to start back into the craft show market. They really are so much fun. I especially love meeting all of the other vendors and getting feedback from fellow artists. It is so encouraging to hear other people say nice things about your work. I know I'm not five, but I still get excited when someone says I am talented :)
   Here are a few pics from my new set up from the Latimer Hall Arts & Crafts Show. This really is a cool show that happens once a month in downtown Woodstock, Ga. If you're in the area, come on by and check us out. The next show is June 15th!
Owl Canvas $45
 Abstract Flower $35

 Moustache Mason Jar $14.95, shot glass $8.
 Super Fab Yellow Sparkle Display Clips $2.50
Super Fab Blue and Green Sparkly Display Clips $2.50
 Purple Hand Painted Side Table $65


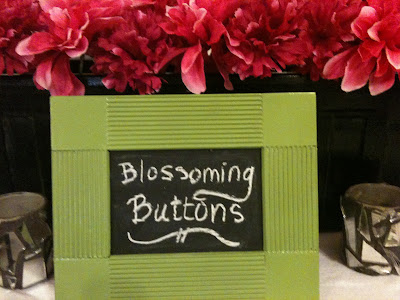
 Matted Blossoming Buttons Print $17
 Fill in the Blank Thank You Notes with matching printed envelopes


   So glad to have met all of you other vendors at the show on Sat. and really look forward to seeing you again! Please visit my facebook page for daily updates and new products!
 Or, check out my listings in my Etsy shop!

Here are some of my listings that I featured at the show! Click the links to see more pictures!

*Moustache Shot Glasses
*Moustache Mason Jar Glass
*Super Fab Art Display Clips


Saturday, May 18, 2013

Thrifted Toy Storage


    I have been buying and painting furniture from the thrift store for as long as I can remember. My favorite piece I got before going off to college, where I knew I would have my own space to design and fill. I bought a vintage school desk and painted it orange and left on the old flowery knobs. I still have this piece of furniture, after many different coats of paint and several knob changes, it sits in my son's room and once served as his changing table. I love to give things a new look.... when you're decorating on a budget (and don't want plastic furniture) this is the perfect way to transform a space. You are also doing a solid for mother earth-you should always consider buying a 'used' or as I like to call is 'seasoned' piece of furniture. Not only are you being green, but you will feel so good once you have completed a great project for your own home, all by yourself :)


Materials: 
  • one piece of used or 'seasoned' furniture
  • Paper towels and cleaner
  • Paint color of choice (I used 1/2 a can for this piece.) 
  •  Medium size brush
  • New knobs
    First choose your piece of furniture. I knew I needed more storage in my son's playroom.    I was looking for something with a few drawers, that wasn't too tall, he's a climber.  I found this old t.v. cabinet and it was missing the top drawer. Because of this it was marked down to $7. I SAID SEVEN DOLLARS, PEOPLE! Usually, I would expect to pay around $15 or so for a piece this size, still way cheaper than new!  

    I always wipe down the surface of any thrift furniture I buy.  You never know where it has been or who has touched it, so I always recommend washing off your thrift finds before you begin painting, or using it even if you don't paint it.
   Now remove the old knobs. Even if you don't plan on replacing the knobs (some do come with pretty hardware) still remove them so you don't get paint on them.  They could also use a good wash if you plan on using its original hardware. If you like the knobs but not the color, why not paint them, too? They make specific spray paint for metal-go for it!
   Paint the furniture with a good quality paint. I had Behr interior paint left over so I used the rest of that. Don't try to use left over 'craft' paint like acrylic or oil. It will just end up chipping and wearing over a short period of time and then all your hard work will be ruined!
   Let your first coat dry overnight and give it a second coat once you are sure the first is completely dry.

   Replace the knobs after you give it another night to sit and dry. I also found these knobs at Goodwill. I paid $2.94 for a bag of about 30 knobs. What. A. Deal.  I've already used these on several different pieces around the house. You never know what people will get rid of :)
   Lastly, stock pile those drawers and enjoy the new storage and newly found floor space! We use ours as a garage. That's where all of Eli's cars 'live' and he knows where to put them all when it's clean up time! I put two large baskets in the 'empty drawer' and even stored puzzles in bewtween them :) Enjoy your recycled storage, we do!!!!


Here are some knobs I love :)


Thursday, May 16, 2013

Elephant Inspiration

   It's funny how you often get inspired by the weirdest things. A memory, a smell, something that brings you back to a blissful childhood memory.... I recently got a custom order for some elephant prints and was inspired to create an entire line of elephant stationery, printables & canvas art.  There is something about a cute little elephant that reminds me of the old Disney movies, you know, the ones where the characters are not exactly life like and they do not require you to wear glasses to watch them?  Here is the print that inspired it all :)


   Then, I thought, this would make realllllly cute stationery. Insert daydream of planning a future daughters birthday with elephant cupcakes, and balloons, and crafts. So....I took it slow and made these invitations to start:


  I really love working with different patterns recently. I love the way you can change one background and suddenly the entire look or theme is altered. Love the versatility, the ease, of just clicking a button and giving it a new custom look :) Here is a print available in my Etsy shop that demonstates this...the only difference between this print and the first one is the background. Crazy, huh?


Next, I changed the backgrounds, and the wording around and came up with some cute prints that you can group together as a print it yourself grouping. I always try to think about how each art piece would look in my home....I love seeing song lyrics hanging in a nursery so I thought this was pretty appropriate :)


Lastly, I couldn't forget the elephant cupcakes.  I love making cupcakes for any party so I knew a custom party needed elephant cupcake toppers :)  I put together this design that also include labels that can be used for a candy buffet or the elephant themed party favors!


This just goes to show you-anything can be changed or altered! That's part of what I love so much about my job-the ability to make each individual customer happy. I love custom orders! Don't forget to check out the elephant canvas art!

Truck Party Theme

   This little coloring sheet was the perfect accessory for my son's birthday party. I always try to have a coordinating craft table with themed activities at any party where kids will be present. This year I used this customized sheet for Eli's 2nd birthday and it was a hit! The kids loved having something to do in between planned activities. I always say...once you choose a theme, run with it!

I also made a blank version that is available for instant download in my Etsy shop, and I will also  customize the font for free! 
Here are some other accessories and stationery I used for Eli's party.  I hope this helps in your party planning extravaganza! Remember, once you choose a theme just run with it!


Wednesday, May 15, 2013

Animal Track Art

    This is for all those little scientists out there... for the wee ones that love to use their 'noculars to explore and their imagination to go new places. My son LOVES animals and loves to learn about them. The other day he saw some of our dog's footprints and the mud and was very intrigued- insert picture of mommy with light bulb turning on above her head. Why not make this into a cool painting project that will create some frameable art for me?! 
 Materials:
  • Plastic Toy Animals (preferably ones without batteries.)
  • Paint (we used Crayola washable paints for kids.)
  • Construction Paper 
   Choose a few plastic toy animals from your collection that have interesting and different shaped feet. We grabbed a few dinosaurs, a giraffe, a pig, and a bear.  Squeeze some paint onto a paint friendly surface.  I always use old shoe box lids because they are thick enough to withstand paint after several uses.
   Dip the animals into the paint one at a time and 'walk' them across the construction paper. Explain to your kids that all animals are different and each have a unique foot print. They will love to see all the shapes and prints their animals make. My son got so excited and really understood that a bigger animal foot made a bigger print. Pretty cool watching them learn and actually seeing things 'click' like that :)
   After you have done several animals and several colors, start a new one! We created 4 or 5 print papers and I think I am going to frame them in the family room...they turned out really cool! 
   Enjoy 'tracking' everyone!
Here's a cute video of my little guy REALLY enjoying this project :)
  

Here's a great deal on construction paper-I love buying in bulk, especially if you are always crafting!

Monday, May 6, 2013

Splash and Smile!


  Who says you need anything to have fun?! We are always looking for new ideas for rainy days when the solution is sitting right outside your door! I'm not saying that splashing in puddles can solve world problems, but it certainly cures rainy day cabin fever! Eli loved putting his raincoat and boots on to go out and splash in the rain, and as you can see, we have had lots of rain so there were plenty of puddles!

   I hope every child has the opportunity to do this. It just makes me smile thinking about how much fun we had...even daddy put on his raincoat and came to splash with us!


   Now, go out and jump in puddles before your kids are too old to and you just look silly doing it by yourself :)

Sunday, May 5, 2013

10 minute Binoculars!!!

    We made these binoculars on a day when I had a lot of house work and we needed to be inside for a while.  they are so easy to make and my son had a blast walking around 'looking for treasure' or 'discovering that squirrel outside the window' :) It's funny how something this simple can really spark their imagination!

Materials:
  • Two empty toilet paper rolls (or one paper towel roll cut in half)
  • String (long enough to fit very loosely around the child's neck)
  • Stickers, markers (anything to decorate) 
  • Hot glue gun 
   
This is such an easy, almost self explanatory craft. Allow your little one to decorate the toilet paper tubes and hot glue them together down the middle. Cut two small holes on either side of the tubes for the 'binocular strap.'  Tie the string on either side and you are ready to go exploring! 

Saturday, May 4, 2013

Home Made Bird Seed Patties!

  
    I have been looking for a 'bird seed patty' recipe that didn't include weird ingredients that I had to make an extra grocery trip for and I finally found it! This little project is great for those rainy days when you can only paint and craft for so long... my little guy loves using mixing bowls and spatulas and adding ingredients to the pot. He also loves to watch the birds from our back window- guess I shouldn't use saying 'killing two birds with one stone' in this post but we really did :)  hehe Enjoy the home made birdie patties, everyone!

Materials:
  • 4 cups bird seed
  •  3/4 cups flour
  • 1/2 cup water
  • 3 tablespoons corn syrup (I used light and it worked just as well.)
  • Twine or String
  • Cookie Cutters (I found that the larger ones work best.)
  • PAM Spray (or any brand.)
  • Aluminum Foil
  • Plastic Straws
    I like to pre-measure all of my ingredients so they are all ready for my little helping hands to toss into the bowl. I find the more time I involve him the more interested he is.  So allow your little ones to combine all of the ingredients: bird seed, flour, water and corn syrup.  Stir the mixture until the entire bowl is moistened.
   Line a cookie sheet with aluminum foil and spray the foil with your cooking spray. Place the cookie cutters on the cookie sheet and also spray the inside of each cutter, this will allow for easy patty removal in the end.
   Pack the cookie cutters to the brim using a spoon or a spatula and push on them to ensure the mixture has made it into all the nooks and crannies.
   Once you have used all of the bird seed mixture, use a straw to poke a hole near the top middle of each patty, you will have to manuver it back and forth to get it the whole way through.  Cut the straw up and leave  a small part of the it in each cutter so the hole wouldn't close up over night.
   Periodically pack the mixture down in each cutter so your patties will stay together longer once they are hanging outside.
  Once they have dried and are hard, pop them out of the cookie cutter and string them up where ever you want to see more birds! Ours only lasted a few days because the birds loved them so much! Next time I will only put a few outside at a time :)
   This recipe will make about 2 dozen normal size cookie cutter patties,
you can cut all the ingredients in half to make a dozen if you don't want to use that much bird seed... but remember they make cute little gifts for the grandparents!