Tuesday, March 26, 2013

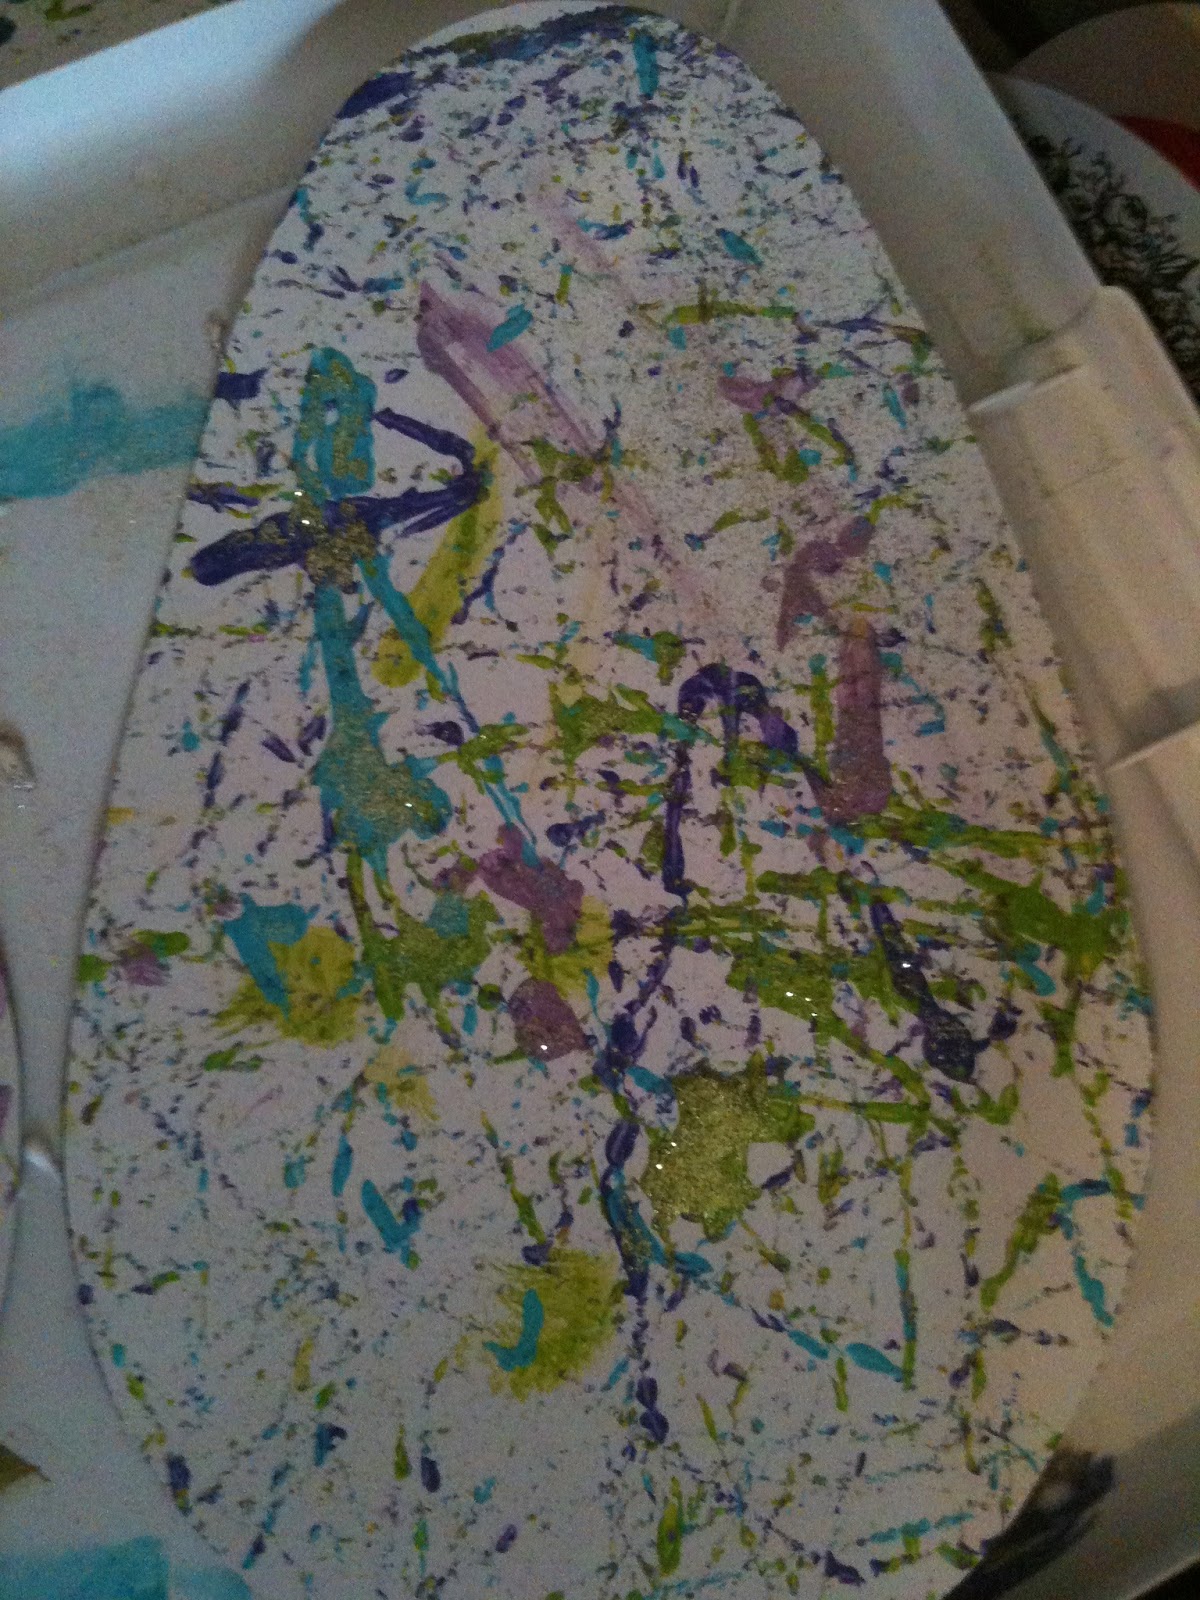
'Marble-ized' Easter Eggs


   This post is a little late, but you still have time to create these beautiful Easter eggs for your family and friends! Or you could use them as decorations like we did... either way this project is quick, easy to clean up and the end result is quite impressive :)

Materials:
  • White Construction Paper
  • Washable Paint (a few different colors)
  • Marbles (or beads)
  • Shoe Box
  • Glitter

   Cut an Easter egg shape out of your construction paper, don't worry, it doesn't have to be perfect!  Now place the paper egg into your shoebox. Set the box aside and get ready to use some paint.
   Choose 3-5 colors to use on your eggs. We used 'eastery' colors but you can pick colors you want.  Dip your marble or round bead into one color and drop it anywhere in the box.  Dip at least one marble into each color and drop each the box.
   Let your child move the box around so the marbles roll over the egg. (Watch the video to the right of my little man loving this project!) Continue rolling the marbles around until you are happy with the overall look of your egg.  If you want to add glitter, allow them to sprinkle any color glitter onto the egg when the paint is still dry. Voila! Now you have a beautiful Easter decoration!!!
   For another Easter egg project, use the same technique on another egg as I did on my Shaving Cream Fish Bowl!

Sunday, March 24, 2013

Recycled Train!


This week I took my little guy to a The Train Museum. Ok, it was actually called The Southern Museum of Civil War & Locomotive History, but we call it the Train Museum in our house, for obvious reasons.  "We" are obsessed with trains. My husband found this site when we were looking for new parks to visit and thought Eli would love it. He did. We spend over 3 hours there! They even had a mommy and me class that we attended (free with museum admission) and loved every second of it! The class teacher, Mr. Ken, is a former kindergarten teacher and was absolutely great at keeping the kids attention. Always a plus when you are attending any kind of class like that, especially with a two year old. 
  We learned and sang about the parts of the train, saw what made the train move, climbed on a foam train and we even made a recycled train at the end of the class. I was most impressed with the craft train. You know I love a good craft, but I love a good recycled craft even more :)  We will definitely be attending many more classes at The Train Museum that is for sure! If you are in the Kennesaw, Ga. area I highly recommend you stop by for a visit, especially on a Thursday when they are having the train class!


   Materials:

  • Small Cardboard box (Tea Bag boxes are great)
  • Toilet paper roll
  • Wine cork
  • Black construction paper (any color will do if you don't have black)
  • Half an egg carton
  • Paper plate
  • Washable Paint
  • Paintbrush
  • Crafter's Glue/ Hot Glue
  • Scotch tape


   Start by cutting your egg carton in half with a long, serrated knife.  Tape both sides together so your train body will stay intact when you are painting in the end.  Next, cut your box in half using the same large knife. This is obviously a job for a grown up before they kids are involved :)  I like to get all of my 'supplies' together before we sit down so I don't end up with a frustrated little boy.  The last 'prep step' is cutting a triangle out of a paper plate. If you have a small paper plate you can just quarter it and use one of the pieces for your 'cow-catcher' on the front of the train.
  Now that the prep is done you can get your little one involved. Using the crafter's glue, attach the Tea Box to the top of the upside-down egg carton.  I like crafter's glue because it dries faster than Elmer's but is still safe for them to use...with supervision. Hold the box in place for about 15 seconds to let it set. Count out loud and encourage your kids to count with you.  Eli is really into counting now so he digs this part.
   Next, attach the toilet paper roll to the top of the train body, or egg carton. Hold it for about 15 seconds. 
   Attach the quarter piece of paper plate to the front of the train using scotch tape. The teacher called this a 'cow catcher' at the mommy and me train class, but it is actually called a 'cow killer' as one of the other moms so eloquently put it...adding that our kids are to sheltered these days. I just shook my head and quietly agreed as I turned by chair back around :)
  Now attach the wine cork to the center of the toilet paper roll using some more craft glue. Hold it for a bit longer, maybe 25 seconds,  so it can dry and will stay put. 
   The last step to assembling the train is adding the wheels. Cut small circles out of black construction paper, or any color you have on hand, and glue them to the bottom of the train. We used 3 or 4 on either side.
   Let your train dry for a few minutes before you start to paint. Let your child choose a few colors for their train and let them paint it all over. We chose red and blue because Thomas is blue and Norman is red :)  I was so pleased with the end result and so was Eli. He gave this to his Daddy to take to work to show off to his buddies.
   If you are feeling REALLY crafty, check out this recycled train!


Saturday, March 16, 2013

Custom Coloring sheet!

Because I love all of you so much, I have decided to offer an (almost) FREE coloring sheet! Use this sheet to customize your child's next birthday party or just at home on those rainy days! Set up a coloring station at the party where you provide everything they need to 'customize their ride.'  Set out crayons, glue sticks, stickers, pom poms, glitter, anything to help them create a custom truck.  Use the coloring sheet in an activity station or roll it up and tie it with a ribbon to stick in the party favor bags :)


Click Here to purchase this custom coloring sheet in my Etsy shop.


Are you having a truck themed party? Well check out my adorable Truck Invitations and printable party accessories! Click the links below to find more Truck themed Stationery!

***
Truck Birthday Invitations and Envelopes.


***
Printable Truck Birthday Invitations.


***
Printable Truck Party Set.


Wednesday, March 13, 2013

Scrap Paper Project!

Scrap paper. Should I save it? Toss it? No! Don't throw it away, save it for goodness sake! If you are into crafts with your kid at all, you know what I am talking about. Those little pieces of construction paper left over after you practice cutting, gluing, etc. that really start to get on your nerves. I started doing this little project with my son to utilize all those extra scraps. Just save all your left-overs in a ziploc bag and use then when you have enough for this fun art project. When they are gone...start saving again!
Materials:
  • Scrap paper (any old kind will do!)
  •  Glue Stick
  • Washable Markers
   Start by drawing a shape of an animal, letter, number, anything you can think of! I used an octopus because this is what my son requested. We did a car after that.  
   Tare up all your scraps that you have saved in your little ziploc baggie.  Make the pieces small enough so little hands can grab them and glue them on, you also want them to fit throughout the entire shape. You could even tare up longer pieces for legs, arms, etc.  Now let your child glue the little pieces of scrap onto their 'octopus.'  This project is great for hand eye coordination and can really help them with patience.
   Try to encourage them to glue 'inside the lines' and talk to them about why they are putting the pieces where they are. "Are you gluing the eyes? Good Job! Where is that green piece going? Oh cool...the tentacles!" Kids are more likely to get into something if they see that you are enjoying it, too. Enjoy this time when they will sit down and communicate with you because I am told that will not last long :)

  Do they want more?!?! Give it to them! Use your scraps from this project to add buttons to your Recycled Race Car, or add little feet to your Egg Carton Caterpillar! These are just a few of many ideas! Happy crafting, everyone! :)

Tuesday, March 5, 2013

Cotton Ball Polar Bear

   With the weather so unbelievably cold lately that even us Georgians are getting snow flurries, I thought this wintery craft was appropriate.  The last time it snowed Eli was still a newborn, so I wanted to explain to him what was happening and where the snow came from. Naturally, I turned to a craft and some printouts to do the trick. Now Eli is well versed in snow and we have a beautiful craft to show for it! 
Materials: 
  • Construction Paper
  • Cotton Balls 
  • Q-tip
  • Blue and White Washable Paint 
  • Paintbrush
  • Elmer's Glue
  • Googlie Eyes  
  You can use any color construction paper, but I suggest not using white so the 'snow' sticks out a bit more (we used gray).  Draw a line about 2/3 of the way down the paper and ask your child to paint snow on the top section of the page, above the line.  It's important, especially for toddlers, to learn to follow instruction. Guiding them through a craft is the perfect way to teach them how to be patient and how to follow the rules.  Now, let your child dip the Q-tip in blue and white paint to create the snow falling from the sky.   Show them how to dot the paper so they make little dots of snow, instead of using the Q-tip like a paintbrush to create strokes.
   Now grab the cotton balls and the Elmer's glue. Coat, or have your child coat, the bottom portion of the paper with glue. Then show them how the cotton balls stick to the paper when they place them on the page.  My son really loves to use his glue stick so this is probably his favorite part :) Explain to them what snow looks like, what it feels like and why it happens.  If you need some help explaining the scientific details on snow, play this educational video all about snow while you are creating your own!
     Now that your 'snow' is covering the page, you are ready for the polar bear. Trace a polar bear outline on white paper, cut him out and let your child glue him on. If you'd rather print out a polar bear or need some drawing inspiration, (come on, you can draw one!) go here to see some cute polar bears.  All that's left to do is give him some googlie eyes-everything looks better with googlie eyes!  Happy Cotton-ballin', everyone!
  *** I love new ideas~ Share your crafts or DIY projects on my facebook page! If you are out of ideas, check out my Pinterest boards!***

Sunday, March 3, 2013

Glass Container Party Decor

   Just a few minutes of assembly and you have these cute, coordinating table centerpieces!  They are so easy to make and you probably have most of what you need on hand.  Choose any little toy or trinket that goes along with your theme to pull the party together. When my son turned two, I had several of these on the tables with balloons anchored inside of them. They turned out so cute that I had to share this little gem!
Materials:
  • Glass Container (any shape will do!)
  • Birthday Candle
  • Plastic Toy/Trinket
  • Glass Beads  

   There is really only one trick to this simple project...holding the plastic toy, in this case a truck, in place when you pour in the glass beads. Fill up the bottom of the container with a few bead then place the truck against the front of the glass and begin to fill in beads behind it. After a few more beads, add the number birthday candle above the truck. If the jar opening is not big enough for your hand to fit while you fill, slightly tip the container forward so the truck stays in place and pour the beads in slowly. It may take some finageling with after the entire container is filled with beads, but as long as you can see most of the toy the overall effect is achieved.   
   I love this project because it is cheap and easy but it looks great.  You can use any number of things instead of the truck like I chose. Use plastic Dora figurines for a Dora themed party, Dinosaurs for a Dino Party, etc.  I bought my glass containers at Goodwill for about $.75 a piece and bought all the beads for 6 centerpieces for $8 at the dollar store! Happy party-planning, everyone!


Saturday, March 2, 2013

Shaving Cream Fish Bowl

      I did this craft with my son after we saw an aquarium at the Dr.'s office. He was fascinated by the fish, the coral, the movement. A light bulb went off over my head. What a perfect opportunity to teach him about the ocean, and give him his own little piece of it! This is a simple project with just a few steps. It is not your run of the mill paint brush to paper craft, and sometimes a change is nice.
Materials:
  • Shaving cream
  • Fish stickers (or cut outs)
  • Washasble liquid watercolors
  • White cardstock
  • Construction paper
  • Spatula
  • Cookie Sheet
  • Scotch tape
   Start by getting out all of your supplies and setting up your 'assembly' line before you bring your kids over.  First cut out a fish bowl shape from a thicker type paper (do not use construction paper for the fish bowl!)...it doesn't have to be perfect, a circle with a small lip at the top is ideal.

   Let your child spray the shaving cream on to the cookie sheet.  Then, allow him to squeeze several dots of watercolors on top of the shaving cream. Push the fish bowl down about half way into the shaving cream/food coloring mixture.
   Remove the fish bowl from the shaving cream mixture and place it onto a few paper towels. Now scrape off the shaving cream using a spatula. Get as much of the shaving cream off as possible and allow the fish bowl to dry for about 20 minutes or until it is dry to the touch.
  Now you can decorate your fishbowl with your fish stickers! I found this was the best time to talk to Eli about different types of fish, where they live and what they eat, etc. (as well as remind him that the Dr. had an awesome tank that we got to see at every check-up!) He also enjoyed counting the total number of fish in his bowl and naming their colors.  I used some cute (free) printouts to teach him the actual fish parts and their actual names. My biggest pet peeve is when parents dumb things down for their toddlers...you'd be surprised at what they can learn if you just explain things to them!
    Lastly, glue your fish bowl to some blue construction paper (or any color for that matter) and enjoy your fish tank on the fridge for several days before it gets over run by new projects :) Happy crafting, everyone! 


If you haven't heard of liquid watercolors, check them out!