Showing posts with label #youcandoit. Show all posts

Tuesday, February 26, 2013

Repurposed Frames

   This is another project that I have been doing for years. It's so easy and will really save you a TON of money. All you need are old frames, or frames purchased from the thrift store, and some paint. I love to group a bunch of pictures together, but that can get pretty expensive. This idea,  takes so little time and money and  will give you a beautiful arrangement of pictures you can be proud of!


Materials:
  • Spray paint (or any kind of permanent paint.)
  • Assortment of thrift store frames
  • Drop cloth
  • Painters tape  

   To start this project, make a run to your local Goodwill or any other local thrift store.  Go straight to the frame section, and trust me, there will be a HUGE frame section. It always amazes me what some people will throw away.  Luckily, for me, they decided to recycle it instead :)  Choose an assortment of frames with different textures and border widths. Don't worry about what they look like now..try to look past any ugly floral patterns or paint chipped frames, they will be beautiful when you are done with them! The one thing I do suggest is only choosing frames that still have the glass intact-you need frames with 'good bones.'   First, take the frames apart leaving the glass separate so it doesn't get painted.  Now grab a drop cloth so you can prepare for painting.  I try to keep the pieces together so I know which frame went with which parts.  You can even go as far as labeling them with a pencil before you take them apart.  You want to have just the actual border part of the frame, but if the back stays attached you can just take out the glass and cover any area you don't want painted with painter's tape.
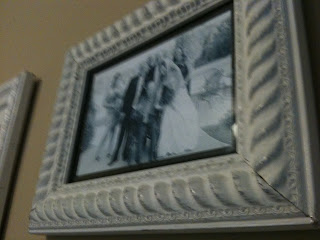
  Bring your frame pieces to your drop cloth and cover with one coat of paint. Use even strokes so you avoid any drops of paint falling and glooping on the frame. I usually use spray paint because it is so much quicker but you can always use paint and a brush, too. Allow your frames to dry for at least an hour before applying another coat of paint. I recommend at least two coats so your frames are not splotchy.
  Let all your frames dry overnight then re-assemble to see the magic you have made! Now all these matching frames are ready to be hung in your home! Don't you feel so proud of yourself?! Go enjoy and repeat :) These frames would look great over your DIY headboard!
 

This is the paint I used for this project (I used whtite):


Monday, February 25, 2013

Re-purposed Head Board!

I love, love, love turning thrift store finds into functional pieces of art.  My guest room has sat empty since we've moved in (I'm not going to admit we've been here over a year) and I figured with our first overnight guests coming it could use some sprucing up!  This project is so simple it hurts me to think how much people are spending on store bought head boards!  Just a few simple steps and you can have this gem for your home, too!
   
Materials:

  • one old fireplace mantel (purchase from the thrift store if possible!)
  • one can of any color spray paint
  • hammer
  • sand paper
  • nails
   I started this project by high-jacking this awesome old fireplace mantel that was just sitting in my parents basement.  I was so excited when I saw it sitting there and even more so when I got the go ahead to take it.  My brother and I now both live very close to our parents home.   This is not the house where we grew up so all of our left-over childhood trinkets are packed into brown boxes and stored in my parents massive basement.   This is kind of a sticky subject in their house...so needless to say, almost every time we leave family dinner on Sunday night, we leave with a few boxes and some random clutter my dad wants to get rid of. I love this. My parents both work full time so they don't have time to do all the DIY projects like I do. Another plus for me :)

Friday, February 22, 2013

Hey guys!

Ok, so I am new to this whole blogging thing, so bear with me for a bit. My name is Jessica, I am the owner/artist at Blossoming Buttons. We do all kinds of stuff here. While I started the business with custom stationery, it continues to grow every day! We are even doing custom birthday parties now-it's so fun!
   I wanted to use this first post as an introduction to me!  So here goes nothing....I love anything DIY and anything art-related. At a very young age my parents noticed that I could draw...pretty well if I do say so myself :)  From that point on I was getting my hands into every medium I could.  I love oil on canvas, pen and ink and most of all just plain old pencil on paper. That is how my stationery business started-just doodling.
   It began with custom orders for friends and family and slowly grew into something bigger. Now I have a website, a  twitter account, an Etsy site even a Blossoming Buttons facebook page! Amazing, huh? I spend my days crafting and filling orders, I pinch myself daily because I can truly say I am doing what I love. 
   By creating this blog I'm hoping to inspire other fellow crafters to get out there and get artsy. It drives me crazy when people look at art and think "how did they do that?' YOU CAN DO IT! Whether it be a project I've done with my toddler, or a DIY project for around the house I will find that spark and run with it.  I will drag out that DIY person hiding deep down inside of you kicking and screaming  if I have to! I love feedback, and to chat, so feel free to bounce your ideas, projects and questions off of me! 


#DIY #Homeschoolmom #DIYproject #havefun #youcandoit